

PHOTOSHOP FEATURES
Add the wow factor to your images
with Sky Replacement.
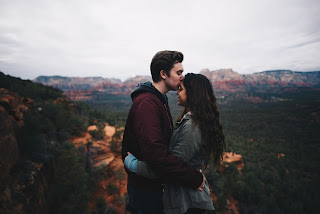
From clear blue skies to dramatic sunsets, Adobe
Photoshop Sky Replacement has all you need to make an image pop.
Transform
images with Sky Replacement.
Don’t
let a drab sky ruin near-perfect images. With Photoshop editing tools you can
quickly
adjust and retouch many aspects of your shots. Sky Replacement is a feature in
Photoshop
helps you enhance your images no matter what the weather was
doing during your shoot.
Here’s how you can replace a sky in Photoshop:
1.
Choose Edit › Sky Replacement.
2.
Use the sky drop-down to select a new
sky from one of the preset sky images, or use your own.
3. Make any adjustments you want. When you’re happy with the new sky, click OK.
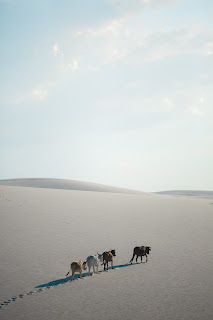
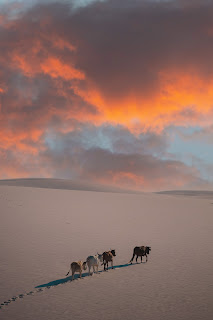
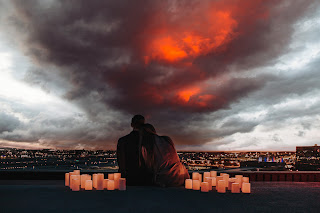
Adobe Photoshop offers a collection of skies, organized
into three categories: Blue Skies, Spectacular, and Sunset. Blue Skies include
daytime skies in solid blue or with clouds. Spectacular skies range from
dramatic storm clouds and soundscapes to rainbows and night skies. Sunset
features yellow, orange, pink, and red sunset hues.
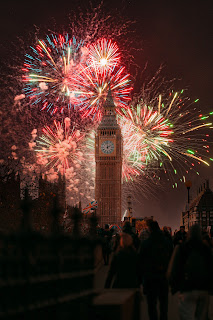
For even more skies, go to the settings drop-down
in the Sky Replacement window. From there, you can import your own sky image as
any file type Photoshop supports. Or download free sky presets — including
tornadoes, northern lights, fireworks, stars, and the milky way — from
professional photographers.
"The best thing about Sky Replacement is
that everything remains editable via the traditional Photoshop workflow,” says
Photoshop expert Jesús Ramirez. “This is not like a filter where once you apply
it, you’re stuck with it. You actually have a lot of control, and all these
controls eventually become a layer mask or adjustment layer.”
How to enhance or alter your Sky
Replacement.
When you use Sky Replacement, you can control
both the new sky and all the elements in your original image — no background
removal or new background layer is required. Fine-tune your original image,
then finesse the color, position, and more of your new sky image. Finally, if
needed, perfect your new image as a whole by using an adjustment layer or two.

Thank you for sharing this important post. I really appreciate the effort you put into researching and writing it. It's clear that a lot of thought and care went into this content, and I'm sure it will be valuable to many people. Keep up the great work!
ReplyDeleteThank you for sharing this important post! I really appreciate the effort you put into researching and writing about this topic. Your insights and perspective are valuable and thought-provoking. Keep up the great work!
ReplyDeleteI just wanted to say that this post is really important and well thought out. It's clear that a lot of effort and research went into making it, and I appreciate that. The information and insights shared in this post are invaluable, and I will definitely be using them in my own work. Thank you for taking the time to share this with us. It is truly appreciated.
ReplyDeleteThanks for sharing your insights and experiences with the community. It's always helpful to hear from other professionals in the field and get their perspective. Keep up the great work!
ReplyDelete